Let’s take a good, hard look at the entire development process, from selecting the right partners to defining strategies, goals and budgets to building the experience from the ground up. In this article, we’ll take you through to the fabrication stage and cover off on a number of key areas including partnering with the right experts, setting clear goals, the importance of the design-build process, and more.
Before you jump into an experiential marketing roadshow, you might want to know “how does the whole development process work?” It’s a good question — and a bigger question than most realize — with a ton of variables and different directions and strategies. It’s a lot like asking how to win a championship in any particular sport. While there is no single, simple answer. There is a formula that leads to success.
We’ve worked with many teams through the years and sat in a lot of boardrooms talking marketing strategy with some of the brightest minds in the industry from Fortune 100 brands. If I’m not at Bank of America Headquarters pitching VPs of Marketing, I’m touring Facebook or Caterpillar Headquarters with strategic marketing teams there. Or maybe in Chicago, New York, or San Francisco collaborating with experiential marketing agencies on how to win projects with THEIR clients. It’s a blast.
Partnering to Succeed
After working with and listening to these innovative teams over the years, we’ve noted a few key components to keep in mind and several potential rookie mistakes to avoid. The key components are what you might call the trifecta of experiential marketing roadshow success: brand strategy, asset strategy and tour strategy. More on those in a moment.
First, let’s talk about partnership. When it comes to brand strategy — what your organization needs to accomplish and how a mobile marketing tour aligns with those goals — finding the right teammates who understand and can effectively act on that strategy is critical.
Too many organizations make the rookie mistake of underestimating the value of selecting the right partners who align with your brand strategy. In today’s market, procurement and legal teams can and do have an outsized influence on partner selection, based on criteria that heavily favors the lowest cost option. Unfortunately, this approach typically leads to less impactful programs. If you’re looking for something more than so-so results, consider a more complete set of criteria.
This is where those key components of experiential marketing come into play. Along with brand strategy, you have the asset strategy — whether you will use a specialty vehicle, on-site exhibit, or venue experience. And you have the tour strategy, which includes promotion, location choice, route optimization, target selection, lead capture, follow-up nurturing and learning cycle.
If you’re a VP of Sales or VP of Marketing and your organization outsources everything, you’ll need a marketing agency partner to weigh in on strategy and how a tour might align with your overall marketing goals. You’ll likely need a fabrication team, or an experienced vendor to design, build or procure a mobile asset or exhibit. Then, again depending on your structure, you may need help with executing the tour, hiring drivers, brand ambassadors, and marketing specialists to manage promotions, lead nurturing, and social media.
In short, the best fit doesn’t depend on the vendor – it depends on you. We suggest a quick worksheet outlining all the pieces and parts of a campaign, and then filling in what you’ll plan, manage and staff internally. That should leave you with blanks to fill in for the remaining roles.
Another rookie mistake at this point is to believe that one partner can “do it all.” The reality is that firms that claim to be “turnkey” aren’t. For example, we might be great custom fabricators and logistical warriors, but only have minimal experience with designing and creating print collateral. Agencies might be great at strategy but often have little to no experience designing mobile exhibits. Internal brand creative teams might be great at print and digital, but get tripped up when it comes to planning events. There’s always a trade-off. And that’s not a bad thing.
No matter who you work with, the process works pretty much the same – design, build, execute. However, choosing partners with overlapping capabilities can create chaos depending on their priorities and values. Firms will always have competing priorities that can and do change over time. But their values are what truly matter and are a key indicator of whether or not they are a good potential fit for you.
It all comes down to looking for vendor partners who recognize their strengths, who’s values complement your team’s values, and who excel at collaborating with other experts in the industry. Easy, right? Don’t worry. A little homework here goes a long way. Review potential partner websites and asking a few questions can help you narrow the list fairly quickly.
- We’ve come up with 12 questions to ask fabrication vendors to help you uncover their Character, Capacity and Cash.
- Tell me about the best results you’ve ever had from a mobile marketing program you designed.
- Tell me about the worst results you’ve ever had from a mobile marketing program you designed.
- Tell me about the last time your team disagreed with a client, and the outcome. “We don’t disagree with clients is a lie, or a red flag that they don’t know what they’re doing.”
- Do you have an Engineering Dept?
- Do you have dedicated Project Managers?
- How many projects did you launch last year?
- How many of those are you still under contract with?
- How many projects are you currently working on? (fabrication)
- How many tours will you operate this year? (fabrication & execution)
- How many change orders do you have on a typical project? Zero is a bad answer, and anything over 5 is a bad answer.
- What can you share about your financial position and banking relationships? Look for banking relationship with major institutions, not credit unions or regional banks. As a business owner, I know small banks have more lax lending standards.
- Do you have cash on hand to finance this work, or an existing line of credit? If you have a line, is there currently availability on it in an amount sufficient for this project?
There are also tons of marketing agencies and experiential marketing agencies, but there are tons of other resources out there to help you select a great agency (AdAge.)
Setting Timelines and Expectations
Once you start selecting vendors, an important question we get all the time is “How long will this take?” The obvious answer is “It depends.” Size, complexity, and lead times for digital hardware or software all have an impact on the timeline.
When it comes to actual fabrication, a good baseline for a new specialty vehicle is 3-5 months. But the project timeline is typically much longer. Before fabrication can even begin, there are a few other pieces of the puzzle that have to fall into place:
- Design: Could take 4-6 weeks or longer depending on how many stakeholders are involved.
- Contract: Procurement and Legal can easily add an additional 4-6 weeks or back and forth “red-line” documents.
- Finance: Once a contract is approved, a purchase order is issued, an invoice is submitted, approved and first payment is paid.
- Winter Holidays: While a vendor may work during these periods, their suppliers may not, which delays shipping, etc. It’s a rare supplier that doesn’t miss a beat during this time.
- Chinese New Year: If any of your electronics are coming from China in January, expect a delay.
Also, if you have multiple parties involved (agency, fabricator, digital content developers, etc.) just coordinating schedules for kickoffs can add 1-2 weeks.
We recommend (but almost no one does this) to begin planning for a mobile marketing tour campaign a year to 18 months in advance. This approach allows you to split some of the costs between budget years.
Roughly, months 1-3 are for strategy development, stakeholder comments, and vendor evaluation. Months 2-6 are for design and vendor selection. Months 6-9 are early fabrication. Months 9-12 are late fabrication, testing, and training. Then, ideally, you’ll have a full 30- or 40-week tour program executing the plan in the next budget cycle, with 2 months downtime to refurbish and retool exhibits based on learning and feedback.
DESIGN
Goals, Scope and Budget
Designing mobile marketing campaigns is such a sweet, sexy overlap between marketing tactics, sales philosophy, digital marketing, and industrial design and fabrication. There’s nothing like it in the world.
What many people find surprising is that the design process is not about a vehicle or static exhibit. It is ALL about the message. In fact, the first question we ask when developing a brief is “When your target visitor walks away after the experience, what is the one thing that you want to be running through their head?” And then we build a campaign around your answer.
Setting this objective up front provides everyone on the team — anyone involved in creating or approving the experience — with a clear, consistent way forward.
The next question typically comes from the client. “What does something like this cost?” We can lean on the old marketing axiom for this one. “Strategy is developed within the constraints of the budget.” Essentially, if you don’t start with a budget for your experiential marketing program, or share a budget with your team, how can they create an asset or tour strategy for your brand? You may end up with some amazing ideas, but none that you can afford.
Setting the scope and budget guardrails at the beginning and you have a better shot at strategies will work harder for your brand. Keep in mind that you can’t get a good steak for five bucks, but you could get a great hamburger. It’s all about setting the right expectations based on your budget.
Does this mean you have to set a budget without input on what different vehicles cost? Of course not. In terms of fabrication, though, there are four physical attributes that all factor into a brand’s budget:
Size (car, van, truck, little trailer, medium trailer, big trailer, etc.)
Function (stages, awnings, pods, 2nd stories, etc.)
Communications (graphics are cheap, touchscreens and virtual reality is expensive)
Finishes (Linoleum vs. Leather, for example)
Talking with an expert or two can help you get your head around what things cost. Click here to book time
Creative Brief
Once objectives, scope and budget are determined and expectations are set, most marketers want to focus immediately on the asset itself. In our approach, however, our work really starts here with a Creative Brief.
At this point in the process, we would have already asked a series of questions about the Brand, your market, your customers, the culture, and how you define success for the program. The team then considers all the factors and market conditions to formulate a campaign strategy, an asset concept, a deployment strategy, and a Sales Conversion strategy.
Working one-on-one with our client or with an agency, we capture those components in a Creative Brief. The brief provides a high-level view of how we’re thinking about your project. It’s an opening scene to answer 3 fundamental questions:
- Do we get it? You want to instantly feel like “this makes sense. Wow - they hit the mark here.” If we mis-interpreted a key piece of product information or critical cultural influence, we all want to know right now.
- Are we on the same page for scope and budget? If we’re thinking too big or too small, that’s a major adjustment and has to be caught up front.
- Does it grab your attention? Like that opening scene, it has to intrigue you, keeping you in your seat and wanting to see more.
Creative Collaboration
With an approved creative brief in hand, we work as part of the Brand and Agency team during a period of close Creative Collaboration. It’s when we’re actively introducing vendors, vetting event locations, vetting technology, presenting price-comparisons, etc.
Technically, we call this time Preconstruction. We even have a preconstruction manager who manages the budget and estimates, pulls vendors into the process, coordinates meetings and calls between the client, our Business Development team, our Project Management team, our Fabrication & Maintenance teams, and our Event Operations teams. Their job is to produce a final, clear and consistent plan aligned with the brief, the Brand goals and objectives.
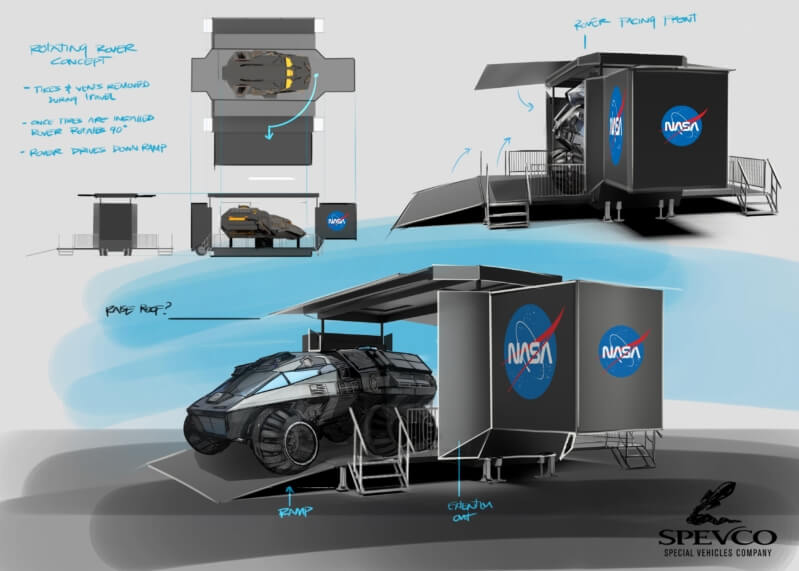
Concept Sketch
As we interviewed a number of giant brands and integrated what we learned into our own sales and marketing departments, a seemingly counter-intuitive truth emerged that led us to refine our approach to design. That truth is: good vehicles don’t always produce great sales results.
This truth caused us to look more critically not just at our work, but at the design process itself. So, as we put virtual pencil to paper to begin sketching the concept for your experiential marketing roadshow, we use specific criteria to track the strength of a design. What we call the three Cs of design — Cool. Communicate. Convert.
- Cool. Turns out there is this weird mashup between cool and “worth my time to go over and break the psychological engagement barrier with that brand.” Looking are not everything. You’ll see a lot of “cool” vehicles “for sale” on the internet because they were designed to do “cool” and nothing else.
- Next C on the list is Communicate. Turns out there is yet another fine line between “yes I walked through there” and “wow, that brand gets it, and I get it with them.” Entertainment without connecting back to your brand isn’t helpful if people walk away saying “that was fun” instead of “I had no idea that’s what they stand for.” Everything must communicate, creating a compelling dialog with your target visitor.
- The last C is Convert. There has to be an incremental increase in sales directly attributable to the program, and the only way to do that is intentionally gather, capture, and track leads developed from the events. The days are long gone where a CMO can tell a CEO and CFO “this program is just to build awareness” unless your brand is Budweiser or Coke. In which case, you’re already doing experiential marketing tours.
Not only do these three Cs shape our design process, they shaped how we went about hiring our designer. We looked for someone who could carefully integrate the campaign mission with the brand story, melding Cool, Communicate, and Convert onto a single page, within a single image. When we achieve that goal and deliver a brief wrapped around those tenets, brands go wild.
(By the way, we found our designer in California. His name is Neil. Convinced him to move to NC. He’s amazing. Follow him on Instagram at @neildesigns)
Lose any one of the three Cs, and you cannot design a vehicle that will produce the results that your CFO demands. Period.
With a concept sketch in place, an overall design and plan for the vehicle starts to form. Now, this is where our Design-Build process differs from most others in the exhibit industry.
Before we move on, let’s get a quick understanding of what Design-Build means in this context. The quick definition of Design-Build is just as it sounds. You contract with one provider to handle the design and construction of the vehicle. The main idea of Design-Build is the ability to overlap Design with Fabrication, creating time and cost savings where none existed before.
In the past, the standard was to find different companies to handle individual steps along the way. One agency developed strategy. Then another designed the exhibit. The design then went to procurement to find yet another company for the build, which usually resulted in the project going to the lowest bidder.
The problem with this old standard process is that it tends to be less efficient, both in time and cost.
With a Design-Build contract, you can execute the project in stages. For instance, if you get agreement and alignment on the base vehicle make, model and cost, we could order that vehicle while the design details are still under discussion. Or, say we’re building a new specialty trailer and the stakeholders agree that it will be a 53-ft double expandable exhibit trailer – we can drop materials and begin fabrication on that piece of the work.
At some point, we will have agreement on a final concept – even if there are still small design choices to make like flooring, fixtures, displays, or graphics. Otherwise, projects can get bogged down among vendors and individual stakeholders at each stage, eating up actual production time and eliminating desired resources or materials options.
Formal Drawings and Approvals
Moving forward. As the design process continues, our concept artists work with the team constantly to review and revise the concept drawings. As more conversations uncover more requirements and more details, we collaborate with the Engineering team to create functional elements as well as design elements.
At a point that makes sense for each individual project, the Engineering Model begins to take shape. This is when we begin to seek client Approval on Engineering Drawings. For example, an early engineering drawing includes a collection of detailed and dimensioned 2D floorplans and elevations for every part of the vehicle, showing entrances, articulating structure, and locations for major utilities (generators, handicap access, major equipment). Later on, however, more detailed Engineering drawings are submitted to the Brand for approval of locations and details of all electrical and communication outlets, lighting, graphics, display dimensions and other details.
With close communication, this sharing of formal Engineering Drawings should provide few surprises. If anything looks off, or out of context from the previous sketches and changes, now is the time to say something.
Approval now means we’re ready to build. Metal will be cut, joints welded, materials and resources utilized, which also means changes to specifications or anything other than graphics will result in additional costs and time.
Even though there is a degree of flexibility in production, it largely depends on the type and amount of change. If we’re still framing the superstructure and you need to change the typeface on the outer graphics, of course that’s doable. Changing the trailer dimensions? Not so much.
PRODUCTION
As part of the Design-Build process, there are a wide range of structures to turn to depending on the scope, budget and objectives. Before we dive into the fabrication process, it’s important to know what you’re getting into before the build begins. Obviously, there’s a big difference between a pop-up tent and a full-size experiential marketing trailer.
Here’s a quick rundown of the most common structure types.
Structure Types
Pop-up tent: Fabric-covered frame branded with logos, containing tables and chairs for brand ambassadors, for smaller events. Usually purchased, erected, and staffed by the Brand or an Experiential Agency street team.
Heavy tent: Truss structure covered with heavy canvas, for larger events. Usually rented from a local event rental company, erected by the rental company, then staffed and managed by the Brand or an event production company.
Custom static exhibit: Staging and temporary structure delivered, unpacked, erected, struck, packed, and shipped for each event. Usually fabricated by an exhibit house, transported by commercial freight, erected by an experiential event company, and staffed by the Brand.
Branded vehicle: Normal, everyday cars and trucks with vinyl graphics applied to exterior surfaces. Usually operated by sales staff, marketing staff, or a Brand Ambassador.
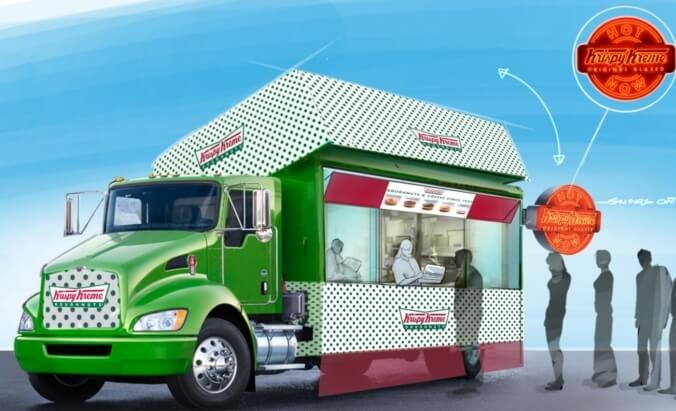
Promotional vehicle: Custom vehicle, usually shaped or partially shaped with custom fiberglass work. Operated by a non-CDL driver or Brand Ambassador.
Marketing tour bus / Recreational vehicle: Lightly modified busses or RVs with Brand identifiers, mainly used for backdrops and photo-ops. Usually operated by a non-CDL driver or Brand Ambassador.
Pop-up exhibit: Modified shipping container, box, or pod transported on a flatbed truck, then craned or forklifted into place. They often have openings, stages, or awnings to allow guests to enter and see retail space.
Merchandise trailer: Usually 53-ft long, with a large opening in the side, primarily to display retail merchandise. Pulled by a road tractor and a commercial operator.
Race hauler: Usually 53-ft long trailer with a finished area for leisure, hospitality or mechanical work in the front section and storage for one or more race vehicles in the rear section, sometimes stacked one on top of another. Branded for sponsors, race teams, or both on the exterior.
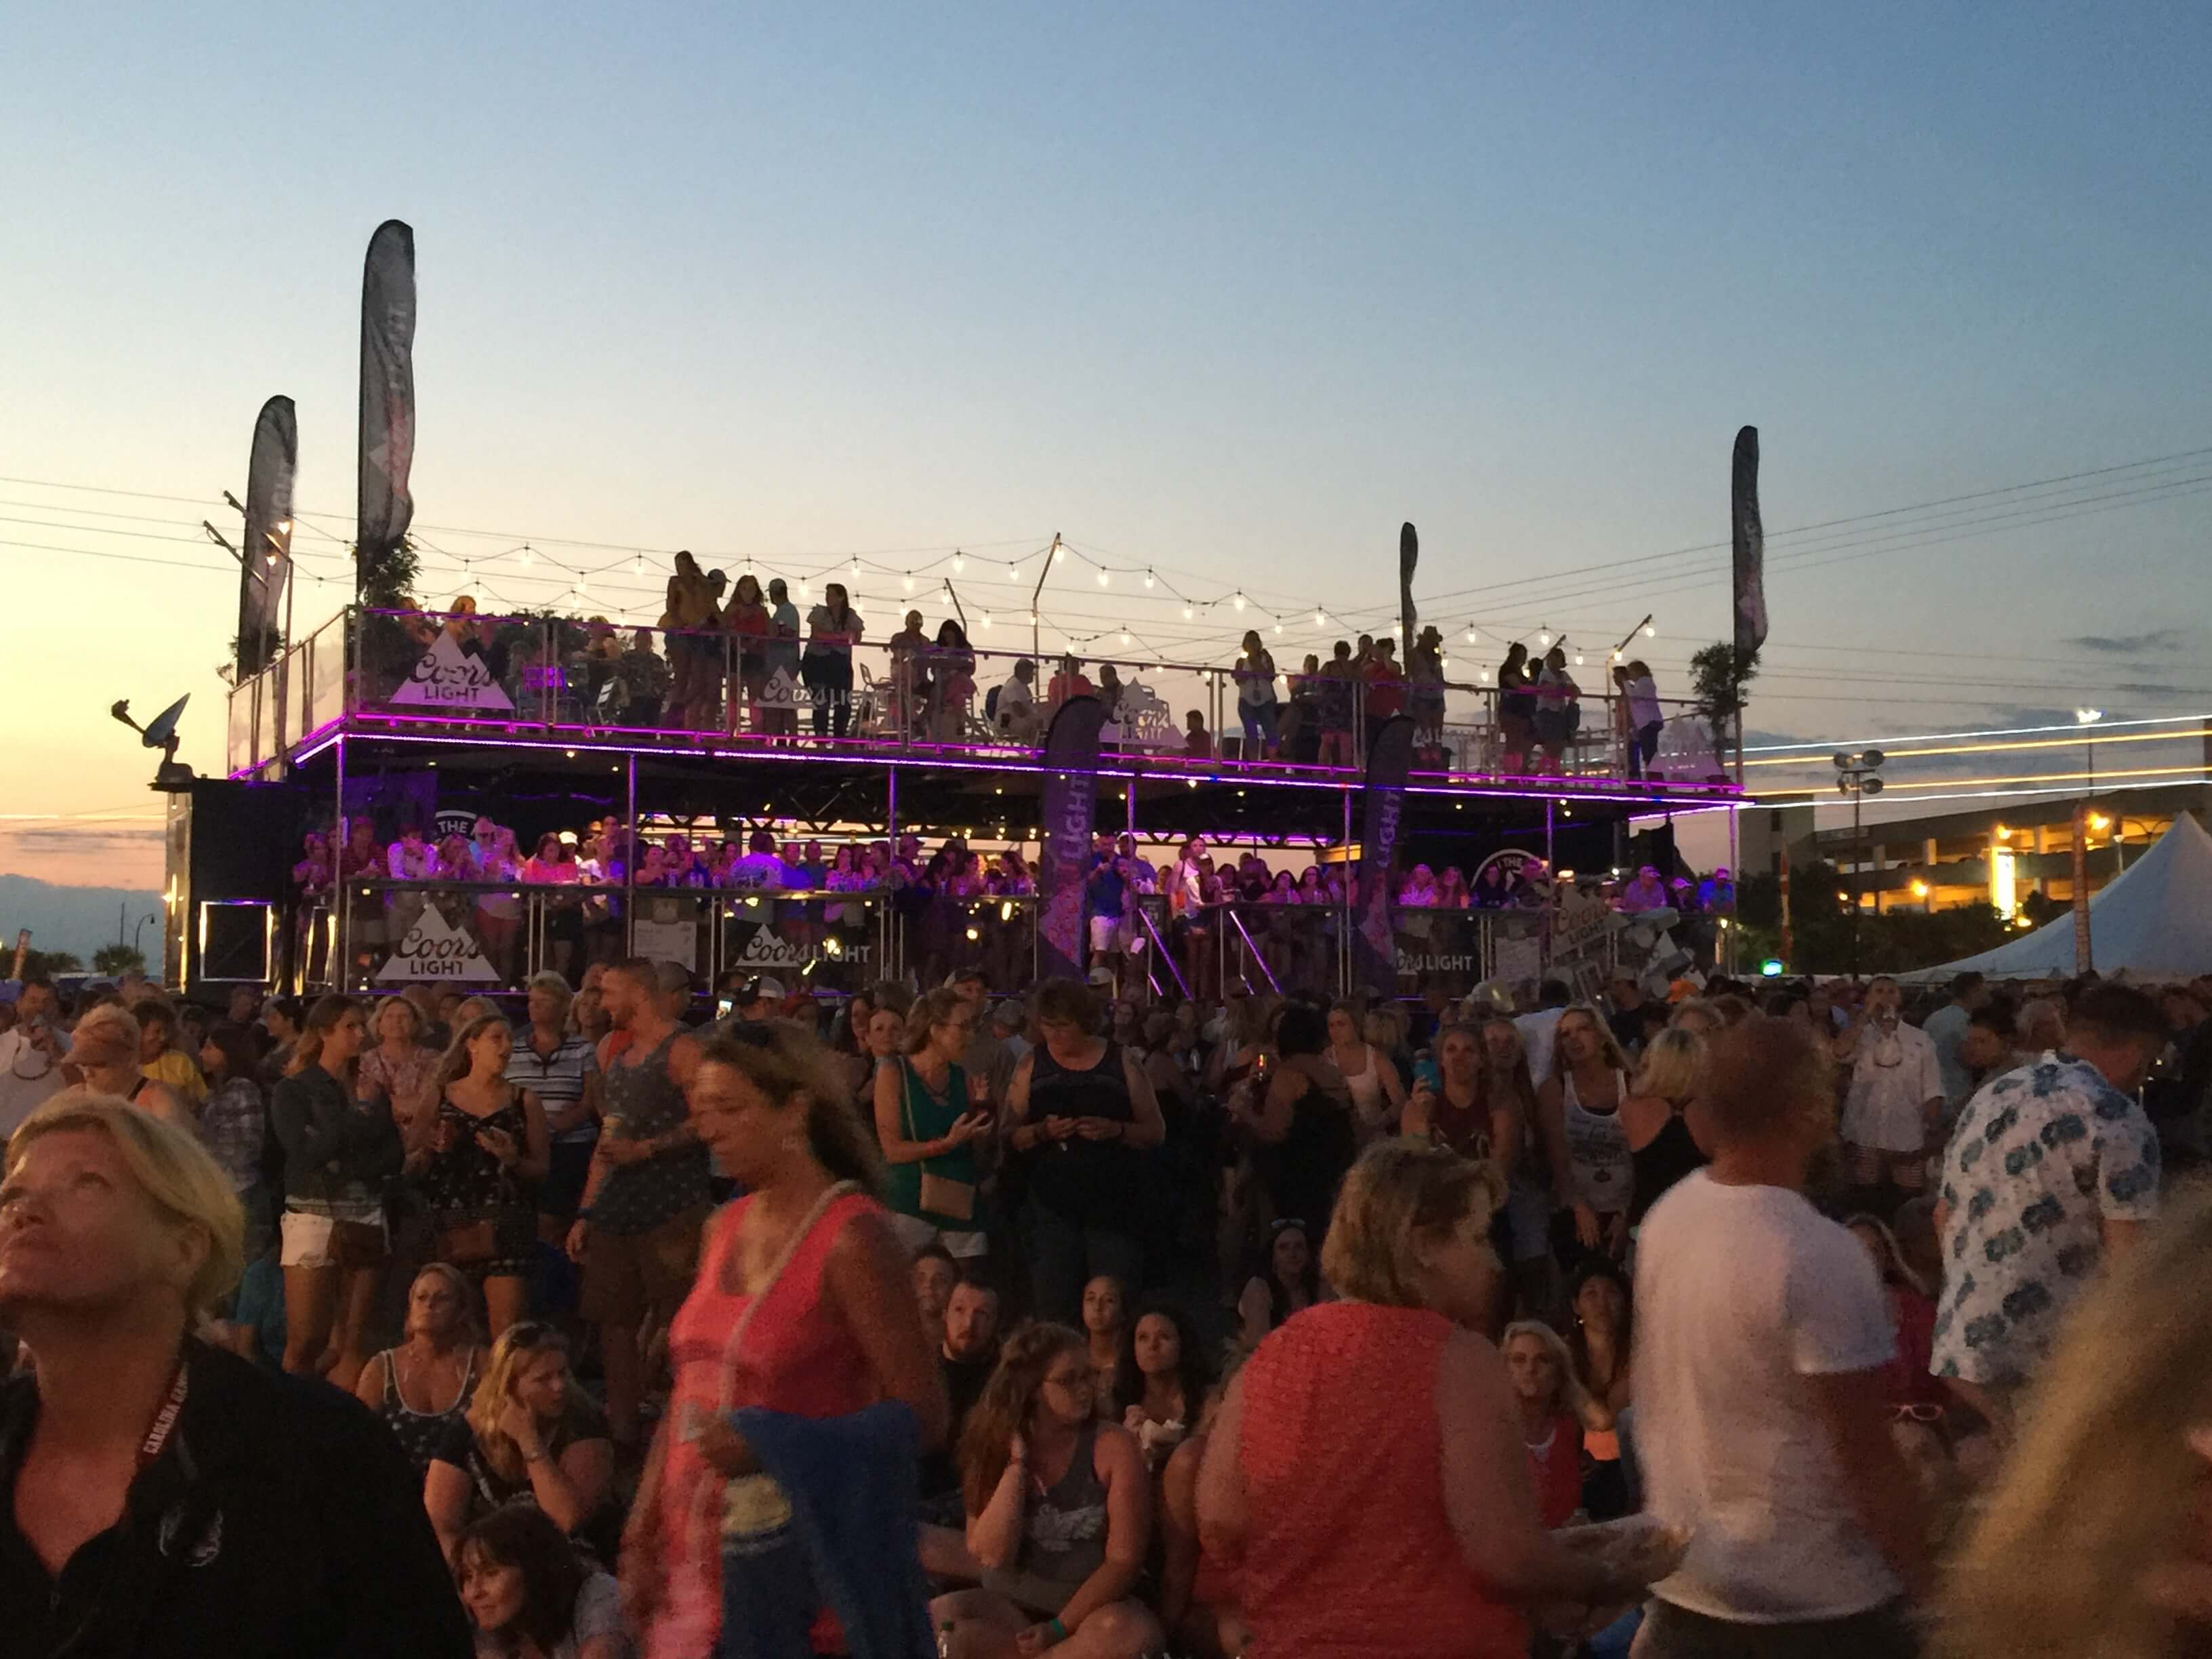
Hospitality rig: Various sized trailer options, with a finished interior/ exterior footprint designed for entertaining large private parties or customer appreciation events. Usually deployed to outdoor sporting events or used to anchor very large trade show footprints.
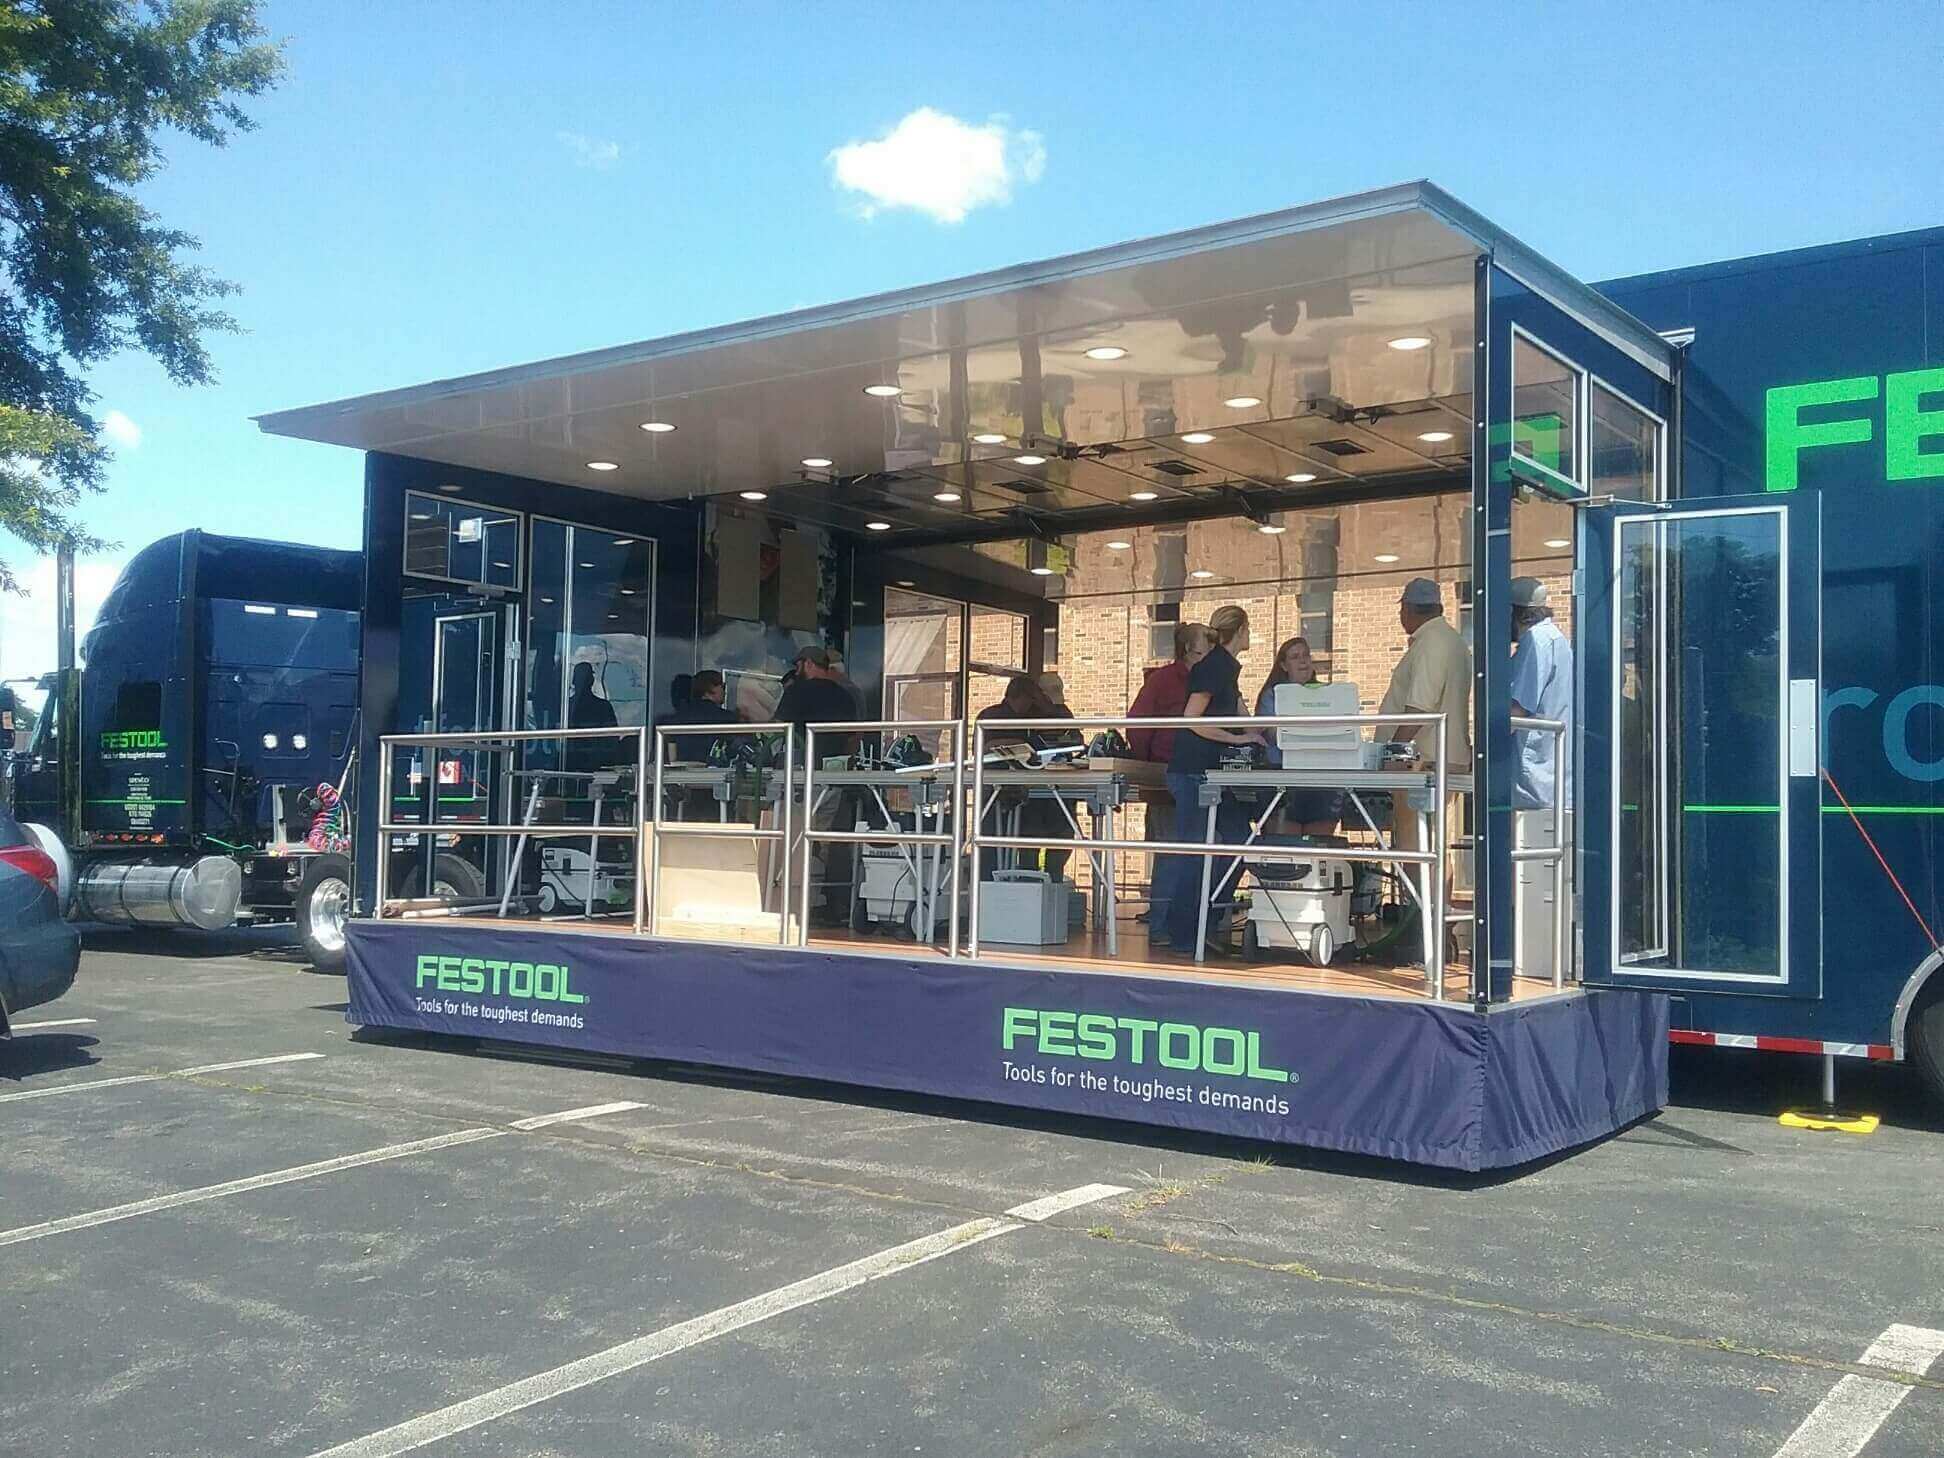
Experiential marketing trailer: Trailer with stages, awnings, or expandable sides of various sizes, dedicated to a custom Brand Experience that fully engages the visitor. These generally incorporate specific data collection and tracking technology that is used on marketing tours that last up 40 weeks at a time.
Fabrication
As the project moves fully into the production phase, our project management team takes more of a lead role. This team is about building it right, on time and on budget.
Whereas early in the process you focused on strategy, concept and look – in this phase the team focuses on exactly what day components are arriving, and what material, texture, and color those components will be. This is the part of the process where we ask Brands to participate weekly status calls and share construction photos.
Our marketing clients love this part, especially since the vast majority of our vehicles are built from new steel from the ground up. Why? It comes down to the difference between special event vehicles and normal vehicles modified for an event.
We often get asked – “I saw a vending trailer online for $4,000 dollars. Why can’t we just use that?” And the answer is “you can.” But here’s the problem. The materials and methods used to build those “off the shelf” trailers or RVs or containers are not the same as the materials and methods used to fabricate a custom mobile event exhibit — because those assembly-line-built products weren’t meant to do what a specialty marketing vehicle needs to do.
The structure and studs on commercial trailers and RVs are typically made of 1” aluminum channels or tube. They use aluminum because it’s light. And the lighter they make it, they cheaper they can go on tires and axles. Also, since most people use them for motorcycles, lawnmowers, or moving their stuff after a messy divorce, the manufacturers are not really worried about heavy use.
The trouble with aluminum, though, is that it is soft. And while that bracket may start out tightly screwed into the stud, the everyday wear and tear of a typical tour will lead to that bracket coming loose or breaking free, most likely at the worst possible time. Steel, on the other hand, is extremely hard and is much less likely to warp, bend or fail under load, force or heat.
“What about corrugated steel containers?” Thanks to those tiny house shows, we’ve gotten a number of questions about using these shipping containers as a cheap alternative. Aside from the cheap steel used to make them and several other inherent problems, the strength and structural integrity of those corrugated sides dives sharply when you start cutting big chunks out of it to fit doors, windows, stages or other features into the space. With all of the additional bolstering and support required, you’re better off starting with a new steel, bespoke trailer.
At the end of the day – can you buy an RV, used school bus, Airstream camper, cargo trailer or shipping container and convert it to a mobile exhibit? You can. But it’s not recommended. Our maintenance team has a number of clients who have come to us after trying all of the above, only to require costly repairs and rebuilds early on in their tours.
We build vehicles and trailers to handle the burden of displays, simulators, foot traffic and constant transport of an experiential marketing roadshow.
The life of a custom experiential marketing vehicle begins in a laser-level jig on the shop floor. Certified welders carefully align the box and band framing in the jig and form the lower chassis.
At this stage, the vehicle looks like a skeleton. It’s the very backbone of the vehicle. We take our time to do this right. It has to be built to do everything you want it to do over and over again. In our experience, this is a critical step in ensuring the reliable performance of the vehicle.
This is also an important point of difference between potential partners and vendors. When it comes to the Chassis & Framing, very few actually build experiential vehicles from the ground up. Many companies have fabrication capabilities; few have serious expertise or experience producing marketing tour vehicles.
Specialty vehicle manufacturers who offer exhibit design, fabrication, program management, event promotion and tour logistics check multiple boxes.
Now that we’ve got a chassis and frame built, we get into shaping and breathing life into the vehicle, which we’ll dive into in part 2 of this article covering exterior and interior builds, third-party effects and electronics, finishing and final approvals. Then we’ll get into stages most companies overlook at the beginning of the process — operations. Stay tuned.
Exterior/Interior
With the skeleton complete, we create the and install floors and exterior panels and mechanisms for transforming the shape of the trailer or vehicle during event set up and tear down.
Complex wiring and other infrastructure are roughed in at this point as well. At this point, the exterior is painted the main, base color to help seal and protect surfaces. This is a key transition where interiors also get roughed in.
Effects/Third-Party Additions
Experiential marketing vehicles come in all shapes and sizes. But almost all of them incorporate different interactive elements, from displays and touchscreens to simulators and hands-on games or demos. The trick is making these consumer engagement points a seamlessly integrated part of the experience both conceptually and functionally.
During this stage of production, those elements get physically incorporated into the vehicle. However, these third-party elements would have been in development along a parallel timeline in order to be delivered, installed and tested in time.
Depending on the vehicle, this would also be when vinyl or other custom graphic elements would be added to ensure proper fit and finish.
Walk-Through, Finishing and Prepping for Launch
At this point, the vehicle is a fully functioning experiential marketing machine. Which means everything should be ready for testing and a client walk-through of all areas and interactive elements. There is always a degree of subtle fine tuning that is made at this stage.
Final finishes and refinements are made and the vehicle is ready to turn over to operations and logistics for the ramp up to launch.
Approvals
During fabrication and production, key milestones should be established along the way to keep all parties informed of progress. There are typically two key approval points during production. One is after the roughed in exterior and interior is completed. And the next is upon completion of the walk-through and any punch list items.
OPERATIONS
It might be tempting to think that once the vehicle is built that all the hard work is done. It’s understandable. What was once an idea on a piece of paper or a simple sketch on a napkin is now a fully functioning experiential marketing vehicle. However, operating than vehicle out in the world requires an entire separate, yet integrated set of skills.
Staffing, Training, Transporting and Working
In fact, by this point in the process operations and logistics planning would already be well underway. Upfront work would include staffing and training for transporting, setting up and tearing down, as well as running and working in the environment, operating equipment, interacting with attendees and other points of contact.
Not to mention the behind-the-scenes work of securing permits, licenses, and other administrative details that, if not handled properly, can stall a roadshow before it even begins.
Reporting and Evaluating
In addition, this is where special attention should be paid to how an experiential marketing roadshow is going to handle reporting, data collection, program and performance evaluation, and enhancements or changes to personnel, scripts, display content, giveaways, or any other variable once the roadshow is underway.
Maintenance
As part of operations, it’s also important to incorporate scheduled maintenance and inspections for the vehicle into the timeline to ensure smooth operation and maximum up-time for the entire tour. For instance, we’ll do these periodically on the road in between tour stops to check. Then we’ll do a thorough maintenance protocol once the tour is complete and prepare for any refinements or changes for the next tour.
PRO TIPS AND RESOURCES
From our talented vehicle designers to our experienced production specialists to our savvy operations experts, we’ve seen it all. Along the way, we’ve also become familiar with common challenges and obstacles that can come up when creating a compelling experiential marketing vehicle. Here are few key areas that stand out.